| Templot Companion | search | remove search highlighting | if the A-Z Index tab is missing click here |
making a start - turnout basics
A page about running Templot for the first time. And some information about turnout basics.
1. Starting TEMPLOT :
To start Templot, double-click the Templot2 shortcut icon on your desktop.
Alternatively, from the Windows taskbar click the Start > All Programs > Templot2 > run Templot2 menu item.
2. Start-up:
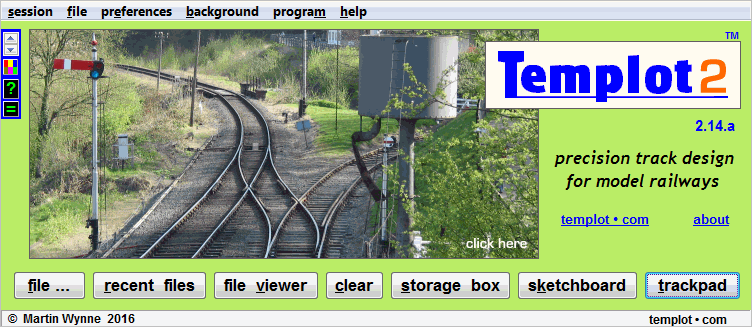
This window will be the first to appear. Click the GO button to start Templot running:

(If you ever start Templot accidentally, you can click the red X to cancel without waiting for Templot to start up.)
When Templot is ready for use, the window will change to this:
This window is called the program panel. Experienced Templot users find it useful, but new users will have little need for it while learning Templot.
As a first-time user, click the trackpad button.
The program panel window will then disappear and be replaced with this full-screen window:

You should now be seeing a drawing of a curved B-6 left-hand turnout template on the trackpad window. This is the window in which all your track design work is done. This start-up turnout template is curved to a scale radius of 10 chains (660 ft) along the main road, and is drawn in an odd fictional gauge called T-55. This has a one-inch track gauge at a scale of 5.5 mm/ft. This is fine for now if you have just started Templot for the first time, there is no need to change it while experimenting.
(It is easy to change to your chosen gauge and scale later. Select the gauge menu items.)
![]() Before going any further, you may want to refer to the Templot Explained beginners guide and watch the videos.
Before going any further, you may want to refer to the Templot Explained beginners guide and watch the videos.

A turnout is comprised of two basic elements, shown boxed in blue above. The area containing the movable point blades is called the switch. Switches are available in several ranges of different sizes, the one shown here is size B in the REA semi-curved series.
Sizes A, B and C in this series are the most commonly used switches in models based on UK-pattern bullhead track. Size A is the shortest, for use in goods yards and other cramped low-speed areas. The next sizes get progressively longer and therefore easier in radius, up to size F for use in high-speed junctions.
The area in which the outer rail of the turnout road crosses the inner rail of the main road is called the V-crossing (or sometimes the "frog"). V-crossings are available in a range of different angles, the one shown here has a unit angle of 1:6. This means that the rails separate by 1 extra foot for every extra 6 feet measured along them.
This is the usual way that angles are designated in railway track, common sizes being 1:6, 1:7, 1:8, 1:10, 1:12, 1:14 etc. In-between sizes such as 1:7.5 or 1:13 are used where limited space makes them necessary.
Turnouts can be created in a huge range of sizes by combining different switch sizes with different V-crossing angles. For example a C switch leading to a 1:10 V-crossing makes a C-10 turnout. Much of your design work in Templot will consist of selecting these different size combinations, and then perhaps setting a curving radius along the main road such that the resulting turnout fits the desired location on your track plan.
For more about switches and V-crossings, see: about real track .
The first thing to do is to switch on your printer and click the help > print F key chart menu item. This will print a chart of the function key shortcuts which can be placed behind your keyboard for reference. (If you find the chart baffling, fear not, all will become clear as you work through these pages.)

If you don't like the screen colours, click the small multi-coloured button near the top left-hand corner and select a different colour scheme.
The B-6 turnout template which you are seeing is the starting condition for the control template. It is waiting there for you to adjust it to the size, length and curving line which you require. There are several ways to do this, but the most frequently used are:
•The mouse actions, when you want to make trial-and-error adjustments. To experiment with the many mouse actions available, click mouse actions for a step-by-step guide to using them.
•Changing the settings on the quick set window, when the template is a common size, and you know exactly the size and radius wanted. Click the NEW button at the top of the trackpad.
•Using the
template > switch settings...
template > V-crossing settings...
geometry > radius and curving...
and other menu items, when you have more specific requirements.
![]()
Watch this screen video to see how easy it is to make these adjustments and print a turnout construction template. Click your first printed template to see the printed template and watch how it was created.
link to this page: https://85a.uk/templot/companion/gs_firstoff.php